
Odd realm как делать крышу
Обновлено: 05.05.2024
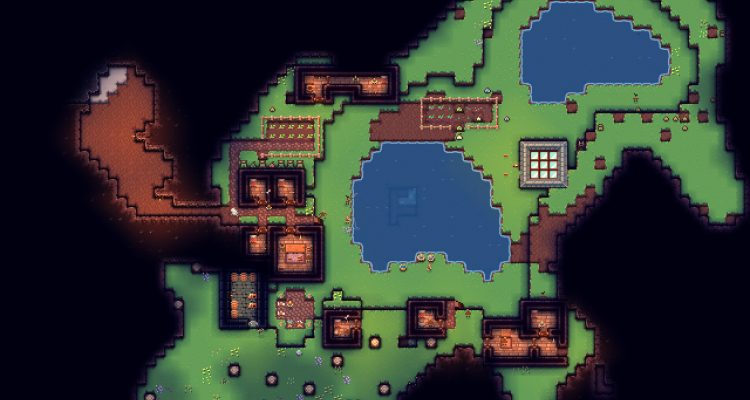
Напоминаю, что это игра про строительство поселения в фентезийном, процедурно генерируемом мире, вдохновленная такими играми, как Dwarf Fortress и Rimworld.
В: Планируется ли автоматический сбор культур с полей? А то я порой забывал собирать их и засеивать снова.
О: Хмм, не уверен насчет этого. Я сделаю опрос в сообществе, чтобы узнать, серьезная ли это проблема.
В: Планируется ли что-то связанное с механизмами или механизацией?
О: Да! Хотелось бы добавить элементы автоматизации. Можно будет строить мосты, ловушки, таймеры и т. д.
В: Планируется ли усиливать сложность врагов с каждой волной или, может быть, появление каких-нибудь мегабистов, лидеров и т. д.?
О: Да!
В: Перевод на другие языки?
О: Да, но с этим будет очень много работы. Я выбрал неверный путь на ранних этапах разработки, я не сделал шрифт, который может увеличиваться, точнее шрифт для акцентированных букв. Добавление поддержки шрифтов для этих букв займет много времени. Это то, что я очень хочу сделать в дальнейшем, но это займет много времени. Глупая ошибка с моей стороны. :(
В: Будет ли возможность выставить флаг защиты, чтобы жители начали бежать и защищать определенную область? А то приходится искать их по всей карте и терять время?
О: Да, я бы хотел добавить некоторый пользовательский интерфейс для контроля боевых групп и организации патрулей.
В: Какие-нибудь взаимодействия с картой? С соседями на карте?
О: Я хочу добавить возможность отправлять поисковые группы и группы захвата для получения ресурсов.
В: Это игра будет больше похожа на Dwarf Fortress, но с графикой и анимацией? Или это проект, всего лишь вдохновленный DF, но с собственными идеями и целями?
О: Игра вдохновлена DF'ом, и я хотел бы продолжать расширять ее, чтобы сделать мир больше и интересней.
В: Планируется ли какой-то отдельный визуализатор крепости, например, изометрический?
О: Не было таких планов. Это достаточно сложная задача.
В: Поддержка модов?
О: Я собираюсь добавить поддержку модов, но не сразу. Сейчас внимание сосредоточено на производительности.
В: Возможно ли в будущем увеличить количество пикселей на тайл, и соответственно, возможность рисовать тайлы/объекты с более высоким разрешением?
О: Вероятно, это будет с поддержкой модов. Я не буду добавлять спрайты высокого разрешения, но, возможно, кто-то другой сделает это в модах.
В: Какие планы на будущее? Дорожная карта?
О: Больше контента! Есть много вещей, которые я просто не включил в лайв-сборку, потому что они еще не отшлифованы или имеют ошибки. Например, функция миграции, которая позволяет перемещать смежные тайлы. Кроме того, есть еще четыре другие расы, которые я еще не добавил, и один биом (тундра). Но в основном просто больше событий, предметов и существ.
If you do not have two screens, then you may need to switch between the game and this tutorial.
Please note, I am ignoring any of the in-game tutorials that pop up, please feel free to watch them as they come up.
Contents
Getting started [ ]
From the main screen select "New."
On the race selection screen, make sure that "Human" is selected. Races have different features and abilities; selecting Ancient will open up options not provided here, and will not have options that are discussed.
In the top right box labeled "Seed" enter the number "20297."
The screen that loads should have a peninsula in the middle of it that is filled with desert. In the middle of the desert are two red tinted areas, these are "Voidland" biome areas. Select the right Voidland tile.
The preview window on the right should have a small pool of water in the middle, and a small pool of water in the North-West corner. Select "Settle."
The "Settler Loadout" screen pops onto the screen; select "Pioneers."
It changes the pop-up to show what all the "Pioneers" will include, please look at these icons for a moment, but I will go into detail on them later.
Click "Depart" when you are ready to continue.
The game map will load and will display the words "Void Ruins" in bold letters, we will get to this later.
One of the settlers for your game will start the in-game tutorial provided on the Tutorial page.
After you finish the in-game tutorial, press the Space Bar to pause the game.
Display Tutorial [ ]
Menus [ ]
The top left corner has two icons.
The Left one is the "Menu" button that lets you save, load, change game settings, and exit the current played game.
The right one allows you to set limits on natural reproduction of your settlers. The left number is the current maximum number of settlers or animals, and the right is the maximum that you can set them to. You can have more than 99 for either, but they have to be obtained outside of natural reproduction.
Quick Status [ ]
The top middle gives a brief state of affairs.
The hourglass indicates how many settlers you have not currently doing any tasks (this should say 5 right now).
The second icon indicates what your current settler count is.
Third is how many raw (uncooked) food items you have.
Fourth is how many cooked food items you have.
Fifth is how many beverage items you have (this includes not only water, but other types of beverages as well).
The last item is Ren, this is the currency for the game.
The top right is the map area and information.
The number in the top left corner here is your current viewed layer. There are 64 layers; layer 1 is solid bedrock and cannot have anything build into it instead of the bedrock.
Under that is a graphic display of where you are currently viewing in the layers. The blue is normally sky area, green dirt, and the bottom section is normally rock-type formations.
Settlement Information [ ]
The bottom right is where you can pull up the settlement's detail information.
Notifications [ ]
This is the first icon, and will let you see what has happened in your settlement.
- Default is "All" and will display everything.
- The Sword tab will display combat information.
- The Scroll tab will show recent learned Blueprints (crafting recipes).
- The Settler tab show anything that is related to settler. It will show here if one of your settlers die, or if a merchant or Bandit appears.
- The Paw tab shows Nature events, like creatures showing up on the map.
- The Pickaxe tab shows anything related to "work." When you are creating a wall, the settler "does damage" toward the tile, and it will display here.
- The Fishing Pole tab shows anything related to fishing, fighting to pull one in, catching one, it's all displayed here.
- The Targeting tab is for "Events." If there is a Lightening Strike, or a dungeon/cave if found while mining, it will display it here.
- Settings, above the "Event" tab lets you choose what type of things move the camera to them and pause the game.
Settler [ ]
The second icon allows you to get specific information about each settler you have. There are 3 tabs at the top of this screen:
Overview [ ]
There are a lot of options to filter the entities in your settlement on this screen.
The top four options let you see your settlers, your tamed animals, wild animals and non-aggressive humanoids, and aggressive humanoids. Click on the "Tamed Animals" option.
There are currently no tamed animals in this settlement, but I wanted you to see how the filter is organized with the description on the screen. The row of icons under the top 4 options are filters for professions, these icons match the icons for the professions themselves. The exceptions being "All" which lists all professions, and " / " which will display anything that does not have a profession, such as children.
Click back on "Settlers."
Each Column of the table allows you to sort by that section, it will toggle between ascending and descending when you click on them. The "Attributes" column sorts by Health (the heart icon).
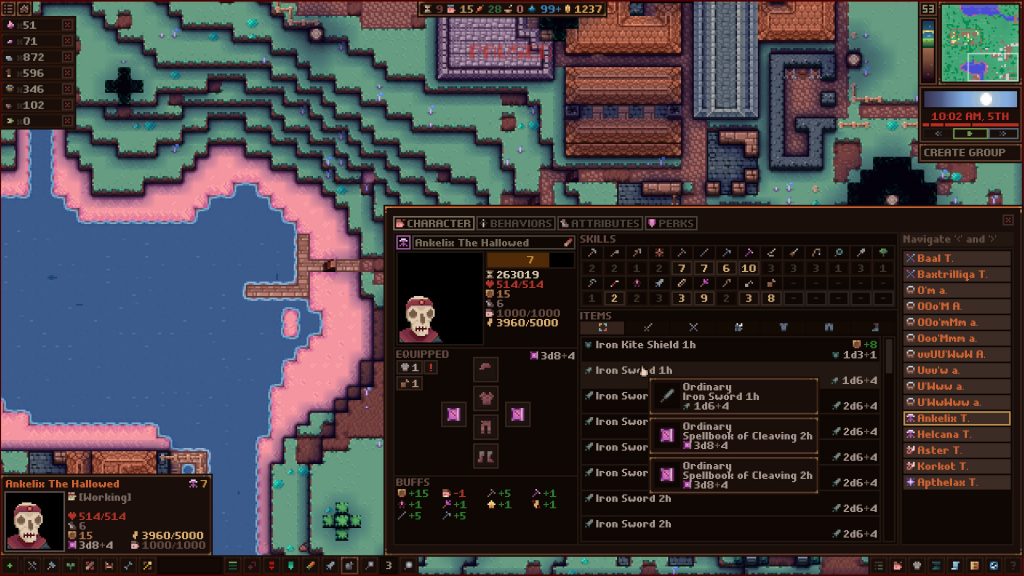
In the "Profess." column, there are 3 icons, the first will take you to the location of that settler. The second one, lets you add them to your selected group (we will go into this more later). The third is their profession. This character is a Carpenter. The following columns show that it's a level 1 carpenter, his/her name with it's race and age.
The Attributes column shows current and maximum health, their Will, Evasion (ability to dodge attacks), Toughness (damage mitigation, hunger (how long until they start starving to death), Thirst (how long until they suffer from dehydration), and Energy (how long until they need to go to sleep).
The Tools column has 2 damages listed. The top one is for the Left hand, the bottom for the Right.
The Status section is used to indicate if a settler is tired, hungry, thirsty, or some other status effect.
Skill Permissions [ ]
As on the Overview screen, the columns let you toggle sorting from ascending to descending.
Each number indicates the skill the character has. The lowest skill level is 1. Natural skill and Profession bonuses can take these skills as high as 5. Beyond that, you would need tools, gear, or to level up the character.
If the skill level is highlighted, that means the skill is activated. Click on a skill level will toggle that character to be able to perform tasks related to that skill.
There is a slider bar at the bottom so that you will need to use to see all the skills.
Skill Priority [ ]
This screen is similar to the Skills permissions screen, except that the numbers highlight when you change them from their default level. The higher the number, the higher the priority that skill is to be done. As a default Mining, Logging, and Farming are highest priority, followed by Survival. Carry, the process of moving something to a designated area (we will get into that later) is the lowest priority with a 0.
This page also has the slider bar to see all the skills.
Uniforms [ ]
This screen will allow you to set up uniforms (equipment sets) for settlers. At this time, there isn't any equipment to use, so it would be hard to go over. We will get back to this later.
Production [ ]
This screen will let you set up manual and automatic production of items you can craft. There are three tabs at the top:
Workstation [ ]
This screen is where you will perform manual and automatic creation of items. There is a set of larger icons which are used to go to specific Rooms.
Right now, none of the rooms are created, however, we will be going over how to set them all up in this tutorial though
Right now "All" is selected, so the items it has listed for you to make can be from any room.
There is a filter section under the room icons that let you look for a specific type of item, such as Tools, Gear, or Meals.
The columns under it allow you to sort the list based upon the column header. This does not list the room needed to make them, just the skill.
Click on the "Camp Fire" icon to change to the production screen for that room type.
The topi item listed is to create "Coal." This shows to make it, we will get 5 coal using the Survival skill, using 1 Wood Log.
Under the "Orders" column, you can click the left arrow to lower the quantity to make or the right arrow to increase the quantity to make. If you hold the CTRL key when you click the arrow, it will ad 5 instead of 1. The number on the bottom in [] is used to show how many of them you currently have.
Next to the right arrow is an infinity sign, that you can use to set up a "make until you have this many" command. When you click on that button, it will ask how many you want to have on hand. This number will appear below the [] to show how many you have set up for the minimum to have on hand.
The "C" next to it will clear the automatic, and the current queue for production.
The "1" next to it show the priority for which it will be made; 0 being the lowest and 3 being the highest. You can left click to increase, right click to decrease.
Active Jobs [ ]
This tab shows which settler is working on which task. At this time, no one will be listed here as no one is doing anything.
Blueprints [ ]
This page shows a complete list of all the blueprints you have learned so far. It does not mean you have the materials to make them, nor does it mean you have the room necessary to make it. However, this screen does tell you which room you need to make it, but not the skill used to make it. It also does not show the quantity of the item made, only what the item is. For example, if you click on the "Components" icon, you will see "Coal" at the bottom. It shows you make Coal using a Camp Fire and it takes 1 Wooden Log, it does not say you make 5 of them, and you need the survival skill skill active on a settler to do it.
Inventory [ ]
This page shows you a concise list of what you have. You can filter it based on the type of item it is.
World Map [ ]
This will load the world map screen that you saw when you were directed to click on the Voidland tile being used by this tutorial. You can use this screen to change to another world map tile. I will not get into it with this tutorial as it's an advanced feature.
This screen brings up an in-game display of Frequently Asked Questions.
Interaction [ ]
This is the bar on the bottom left of the screen.
The icons in this area are used to access functions that allow interaction and information/assistance when interacting with the settlers of OddRealm.
On the right side of this bar there are 2 magnifying glasses and a number between them. This is where you can control how close your screen is to your settlers. The right magnifying glass is Zoom In, the one on the left is Zoom out. 5 is as close as you can zoom in, and 1 is as far as you can zoom out.
Secondary Info [ ]
The next icon to the left looks like a plus sign with an arrow. It's used to show information regarding a square. When you click on it, the barrels and crates on the screen change to boxes with yellow, it shows how full that container is. Water, changes to a ?, and later, there will be numbers. You can stack up to 5 of the same item in a square, and it would indicate how many of those items are in that square.
Show Only Current Layer [ ]
This icon will black out anything that is not your current level of view (indicated by the depth meter in the top right corner).
Toggle [ ]
The first icon on the left is a plus sign, it's used to toggle the current/last menu accessed in this section.
The second icon opens the "Jobs" Menu, which allows you to give instructions to your settlers.
When you click on it, the menu opens up with 2 sections. The top section is a set of 4 colored boxes. These are the Job Priority options. Purple is highest priority (3) and Yellow is the lowest priority (0). They will no do jobs in yellow, but it allows you to set them up for future use, or disable one you had active without removing it completely.
The second section has the commands that you would give to your settlers. You do not give jobs to a specific settler in this area, this gives the command to the settlement, and jobs are handed out to the settlers based on skill availability, job priority, and settler availability.
On the Settlers menu, the 3rd character down was a Forester. These characters have access to the Log skill (it was highlighted on the Skill Permissions screen.
When you click the Log job (it's selected as default the first time you load the menu), you will see a few changes to the screen.
First, the screen will get a red tint, this will allow trees to stand out a little bit more.
You may also notice that your cursor has a tool-tip bar that moves with it. The top section shows what Job you currently have selected. The second one shows the location, health, and temperature. The location is the 3D location. The very bottom left of this map tile is 0,0 on the X,Y axis. Z is the depth (which is the bar to the left of the menu). The health is how much damage your settler has to do to that spot to destroy it, such as logging a Nila Tree which has 25 health and 1 toughness (shield icon).
There is also two new icons that show on the right side of the menu bar. The left one looks like a lockpad, and is used to toggle being able to select a settler (it doesn't allow you to assign them the task, it will just select the settler and cancel the using the job.) The second icon toggles between 3 lines and a bracket, and 1 line (highlighted) with only the center of the bracket highlighted. This is used to toggle between the selected task being only for the current layer (one line), and being able to affect using the skill on additional layers.
You may also notice some squares that are highlighted on the main screen, moving the cursor over them indicates that they are Tree Trunks, and have 100 health and no toughness).
The temperature does not affect the job.
You can left click on a tree and it will have an axe icon appear on it. This tree is now set to be Logged by the next settler available with the Log skill active.
You can also hold the left mouse button and select an area, and it will have all the trees in that area marked with the axe to be logged. (This is more effective with the multiple layers option above active unless you only want to target the trees on that layer.)
When you select this job, you will notice that there are squares everywhere now. Each square is an area that can be mined. If it cannot be mined, then it will.
If you have it set to only affect current layer, then the squares will disappear from all layers except the current. It will display the squares in areas that can't currently be reached if they are under other layers, but you have to make them accessible (typically by mining) to be able to get to them.
If you left click and hold selecting an area with light grey squares to dark grey squares, you will see the darker squares have an ! in them. This indicates they cannot currently be reached.
You can right click (or right click and hold) a square(s) to cancel the job at that location. Go ahead and right click and hold to cancel mining on the selected squares. Right click on the trees you selected so that it will cancel that job on those trees. This is affected by the single/multiple layer option as well.
Note: You did not have to change back to the Log job to cancel the task.
Clear/Remove [ ]
This is used to break down things that are made by you.
Move the mouse over one of the barrels/crates that were created with the game.
There is a tool tip that comes up showing the contents of the container in addition to the tool tip information you saw before.
Click on one of the containers. The clear/remove icon is now on that container. If you don't cancel the job, when the container is destroyed, all the contents will drop onto the ground. Only one item type can be in each square if it's not in a container, so it will scatter over a small distance.
Right click and cancel the Clear task.
Harvest [ ]
When you click the harvest job, it will react similar to the Log job. The screen changes color, but this time, the plants on the screen highlight.
Move your cursor over the different plants in the area. You will see in the tool tip screen is says what type of plant it is. Also, it will say how long until the plant is mature, or it will have a + to indicate the plant is fully grown.
If you right click on any of the plants, the Harvest icon will appear on it.
Right click to cancel any harvesting jobs set up.
This will darken the screen and highlight containers that your settlers can get things out of. Right now, it will show the barrels and crates, but they don't really have anywhere to take them, so they will just end up breaking the containers and dumping everything on the ground. We don't want that, so cancel any Loot jobs you set up.
This will allow your settlers to fish at the edge of water. The water locations they can fish in will highlight. You will want to select a place where you see dark spawn in the water, as this indicates fish in there.
Only settlers with the Fish skill permission set will try to fish. None of our settlers have that turned on right now.
Collect Water [ ]
This will allow you to collect Water (unpurified) for your settlers to drink. You will want to do this until we can get a Well House set up later. I will go over that during the actual game-play tutorial later.
Butcher [ ]
This is used to turn an animal that you have killed into meat and hides for your settlers to be able to use. We haven't killed any creatures yet, so there won't be anything that you can butcher at this time.
Build [ ]
The third icon is where you can tell your settlers to build objects that are permanent onto the map. These are the items that clear/remove can be used to get rid of when you don't want them anymore. They are broken into similar categories as the inventory screen, and have arrows on the far right to allow you to change which page of items you are looking at. How many pages there are for that section shows above the arrows.
Plant [ ]
The Fourth icon will allow your settlers to plant seeds that they have to grow plants to be used for food or other materials. Forestry is used to plant trees, and Plant is used for the simpler plants.
Zones [ ]
Zones are used to indicate places that you would want your settlers to put different types of materials. There are several predefined groups, you can create a custom group, or you can have everything put into a spot with the "all" option.
Containers have a limited amount of space, and you can only have 5 of the same item in a spot without a container.
Тема закрыта
28 июн. 2020 в 13:30
I do not think villagers or anyone should be able to climb more than 1 block high walls no matter what kind without a ladder.
I have a mineshaft and i see them climbing up and down the sides more than 10 blocks which is stupid.
I even have a stairway up.
What im mostly worried about besides it looking stupid, is the fact that enemies most likely can also scale walls like that, which means the walls i created around my settlement is useless.
Please do so no one can climb over 2 block or higher walls. Whatever its constructed or terrain.
28 июн. 2020 в 14:45
I said the same thing on the discord, you should hop in there and add your voice in. Stairs are aesthetic!
The real problem with limiting the height to which an entity can climb is that it makes building tall structures very, very annoying and difficult. Imagine trying to build ladders just to make something simple that's more than one block high. That being said, we have a feature planned which lets you smooth blocks. The idea here is that you'd smooth your walls making them unclimbable. We'll see how well that works in practice. Could be it's super unclear/confusing and also annoying. Thoughts?
29 июн. 2020 в 11:11
The real problem with limiting the height to which an entity can climb is that it makes building tall structures very, very annoying and difficult. Imagine trying to build ladders just to make something simple that's more than one block high. That being said, we have a feature planned which lets you smooth blocks. The idea here is that you'd smooth your walls making them unclimbable. We'll see how well that works in practice. Could be it's super unclear/confusing and also annoying. Thoughts?
If you think realisticly. Thats where you should put ladders or build like a pyramid so they have access to get to that level.
I know this isnt real life. Im just using it in this case. We do use scaffolding in real life. Maybe make them add that temporarily to get up and put it away when going back down.
But ONLY have this for building stuff, so scaling walls isnt like that.
I also just hit a dungeon today and the enemy just kept hitting my villager that was crawling up the wall as i was trying to get them away, since they choose the wall instead of the chairs i built for them.
Sometimes we have to avoid realism if it makes the game annoying to play. Placing scaffolding and ladders is a real pain as you build and, for me at least, doesn't add much to the experience by being more realistic.
A good analogy would be how much people hate manually planting and harvesting crops. I added the farm room to automate this and will be adding the arboretum to automate tree planting/logging. If people hated the process of planting/harvesting, I truly don't see them enjoying the experience of placing scaffolds.
Auto-placing scaffolds doesn't seem like a great option either. It would slow down building a lot as every level they'd have to go they would need to build the scaffolds first. And then what, they have to remove them after? Does the player? How would the AI even know when to remove it? Then it introduces the 'realism' question of, oh, my settlers can place scaffolds to move around when building, why don't they just do that all the time? Why do I need to even put ladders/stairs down?
29 июн. 2020 в 13:49
What about scaling walls only bieng a thing when they built?
In any other case they wont be able to scale more than 1 layer max?
1 июл. 2020 в 9:37
Or, is there way to identify walls built by a friendly faction, and only allow them to climb friendly walls. This doesn't solve the pathing issues. I have the same problem with villagers constantly climbing blocks right next to stairs or ladders. There needs to be a stronger priority for them to use constructed paths instead
1 июл. 2020 в 10:14
Or, is there way to identify walls built by a friendly faction, and only allow them to climb friendly walls. This doesn't solve the pathing issues. I have the same problem with villagers constantly climbing blocks right next to stairs or ladders. There needs to be a stronger priority for them to use constructed paths instead
3 июл. 2020 в 11:19
Sometimes we have to avoid realism if it makes the game annoying to play. Placing scaffolding and ladders is a real pain as you build and, for me at least, doesn't add much to the experience by being more realistic.
A good analogy would be how much people hate manually planting and harvesting crops. I added the farm room to automate this and will be adding the arboretum to automate tree planting/logging. If people hated the process of planting/harvesting, I truly don't see them enjoying the experience of placing scaffolds.
Auto-placing scaffolds doesn't seem like a great option either. It would slow down building a lot as every level they'd have to go they would need to build the scaffolds first. And then what, they have to remove them after? Does the player? How would the AI even know when to remove it? Then it introduces the 'realism' question of, oh, my settlers can place scaffolds to move around when building, why don't they just do that all the time? Why do I need to even put ladders/stairs down?
There was an old game called "towns" (if my memory serves me right), same genre as OddRealm and DF. which had the builders place temporary scaffolding when building very high structures and take them down when done.
It worked pretty well imo. The builder would place the scaffolding all the way to the top . build the structure. then remove the scaffolding from top to bottom.
It was purely aesthetic since the scaffolding cost 0 resources to make and was deployed and retracted in relatively short time.
Toons in said game lacked the ability to "climb" but instead could "jump" 1 block high (same thing, different visuals)
I'm sure that with a few tweaks (since toons can climb). it would be a nice QoL feature for OddRealm as well. :)
Edit: Apparently "Towns" was the correct name. the game is still (?!) on steam. even if it hasn't seen an update that brings it closer to v1.0 since 2014.
Приобретите игру и начните играть — примите участие в ее развитии
Примечание: данная игра в раннем доступе находится на стадии разработки. Она может измениться в будущем, а может остаться в текущем состоянии, так что, если вам не по вкусу то, что игра может предложить сейчас, рекомендуем дождаться её дальнейшего развития. Узнать больше
“To get the community involved as early in development as possible. Delaying the release of the game for another year just to develop in a vacuum seems like a fairly good way to limit the creative potential of any game. And, based on the type of game that Odd Realm is, this is especially so. This is a game that has a large amount of freedom to evolve. It's important for Players to be a part of that process. Their feedback and creative ideas are fuel for the game to grow in interesting ways.”
“To be determined. For us, Early Access communicates that this is something which will get better and evolve as time goes on and is open to player suggestions. Though, we will continue to develop the realm of Odd as long as Players still enjoy the game.”
“Without guaranteeing any specific features, here are some that we're excited to potentially add during the early access period: boats, more biomes, invading other settlements, magical components to make working machines, four more playable races, and, of course, as many items, props, creatures, plants, and scenarios as we can cram in!”
“Odd Realm is at a stage where it is feature and content complete. That is to say, feature and content complete for the Early Access build. This build consists of 4 unique biomes, hundreds of items and props to build, 24+ creature races to encounter, and thousands of generated dungeons, caves, tombs, etc. As well, it's perfectly stable and ready for Players to explore.”
“Yes. The game price currently reflects that of a work-in-progress. As more of it is completed, the price will go up to represent that.”
“Aside from the aforementioned feature and content suggestions that we'll be looking for, Players will be invaluable to help find bugs, provide translations, and create mods.”
Этот продукт не поддерживает ваш язык. Пожалуйста, перед покупкой ознакомьтесь со списком поддерживаемых языков.
Odd Realm является интересным проектом, к которому был открыт ранний доступ ещё в январе прошлого года, претерпевший с того момента достаточно много изменений.
Трудно определить, к какому жанру относится игра. Её одновременно можно назвать симулятором выживания, игрой менеджером, строителем, или как мы это называем, жанр, который возник благодаря Dwarf Fortress. Эта игра очаровательна, а также содержит в себе весьма интересный сюжетный поворот.
В то время как большинство игр этого жанра привязывают вас к вещам или ресурсам, одного вида, с помощью которых вы можете построить свою цивилизацию, Odd Realm имеет большое количество вещей, со своими уникальными игровыми чертами. У вас есть свой сад, где вы можете вырастить людей, но вы можете не ждать этого, и играть прямо сейчас кучей мертвых скелетов, которые действительно хороши в магии. Кроме этого планируется создание еще трех игровых цивилизаций. Odd Realm выполнена в довольно милой пиксельной графике, однако для портретов персонажей применяется более высокое разрешение.
Проведя с ним пару часов, вы понимаете, что Odd Realm, который до этого мог показаться вам очередным заурядным проектом, является весьма интересным представителем своего жанра. Древние скелеты, в частности, обеспечивают хороший игровой опыт. Они не могут ни есть, ни пить, но зато они могут размножаться. Скелеты призывают миньонов, выполняющих для них разные, пока они, в свою очередь, сосредоточены на поиске своих братьев, заключённых в подземную тюрьму, которых необходимо спасти для дальнейшего размножения. Люди, наоборот, более эффективны в сборе ресурсов, но должны посвятить большую часть своей игровой жизни таким вещам, как сельское хозяйство. Они растут быстрее, но требуют совершенно другого стиля игры.
Игра имеет очень хорошие отзывы от тех, кто следил за её развитием с самого начала. Вы можете найти Odd Realm на itch.io или Steam за $ 9.99, что является разумной суммой за такую игру.
Читайте также: